Installation
One small file. The rest installs itself.
Upload a single install.php to your web hosting via WebFTP, open it in your browser, and the installer pulls the full Wintertrace core onto the webspace for you. A browser assistant handles database and admin account. No FTP client, no SSH, no Docker — workable from a phone if that is all you have.
Prefer to upload the complete ZIP yourself? The full bundle is still available — see the download page.
Requirements
If the hosting runs a typical PHP website, it runs Wintertrace.
- PHP
- 8.2 or higher
- Database
- MySQL 5.7+ or MariaDB 10.3+
- Background tasks
- One cron job, every minute
- PHP extensions
- curl · mbstring · pdo_mysql · gd
- Disk space
- ~200 MB for the application; photos grow over time
- Outbound network
- HTTPS to weather providers and updates
No root access required. No Docker. No headless Chrome — PDFs are generated server-side in pure PHP.
Step by step
A standard install. The detailed walkthrough — including provider-specific cron setup — lives in the repository documentation.
- 1
Download the installer
Grab the small installer ZIP from the download page. Inside is one file: install.php. No account or registration is required.
- 2
Upload install.php via WebFTP
Use the file manager or WebFTP inside your hosting panel — no separate FTP client needed. Workable from a phone if that is all you have.
- 3
Open install.php in your browser
Visit the file you just uploaded (for example, yourdomain.example/install.php). The installer verifies the signature and pulls the full Wintertrace core onto your webspace for you.
- 4
Point the document root at /public
Your domain must serve the public/ subfolder, not the upload directory itself. Most hosting panels expose this setting under "domain" or "webroot".
- 5
Finish the browser assistant
The assistant takes over for database credentials, admin account, and base configuration. The four screens are shown below.
- 6
Schedule the cron job
Point one cron job at the bundled scheduler endpoint and set it to run every minute. Most hosting panels expose this in two clicks.
Inside the browser assistant
Four screens stand between you and a running installation. From environment check to admin account, the assistant collects what it needs and validates each input before moving on.
- 1
Welcome and environment check
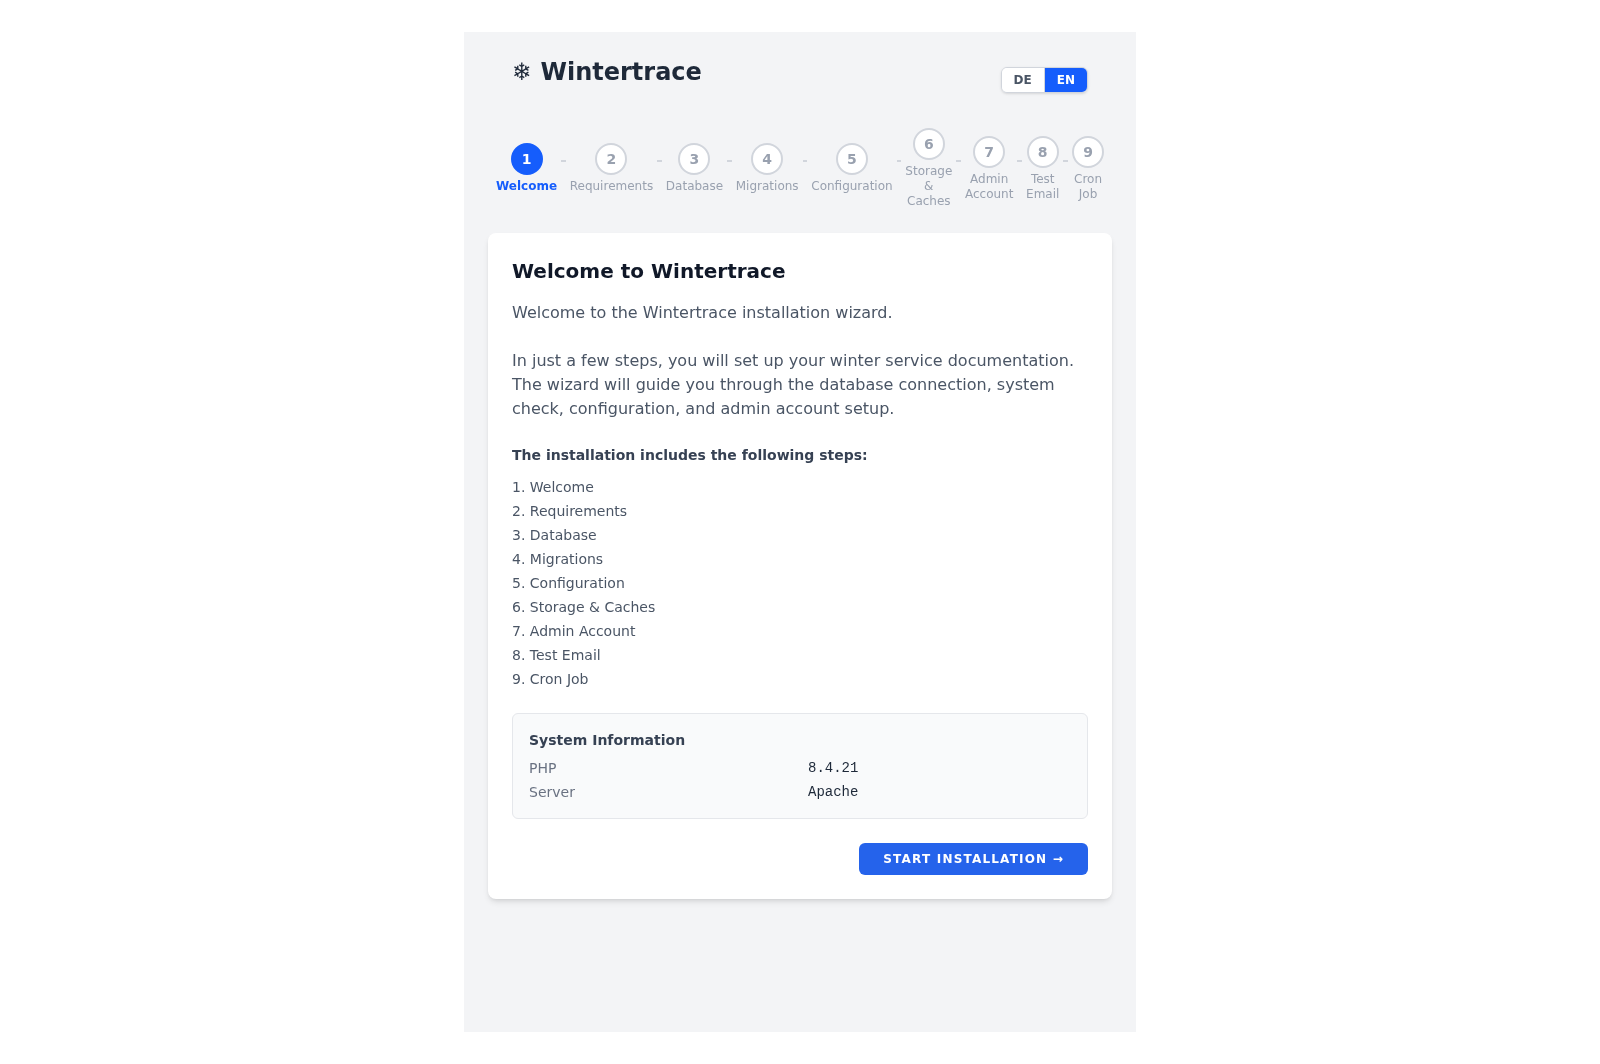
Welcome screen: PHP version and required extensions are verified before installation starts. - 2
Database connection
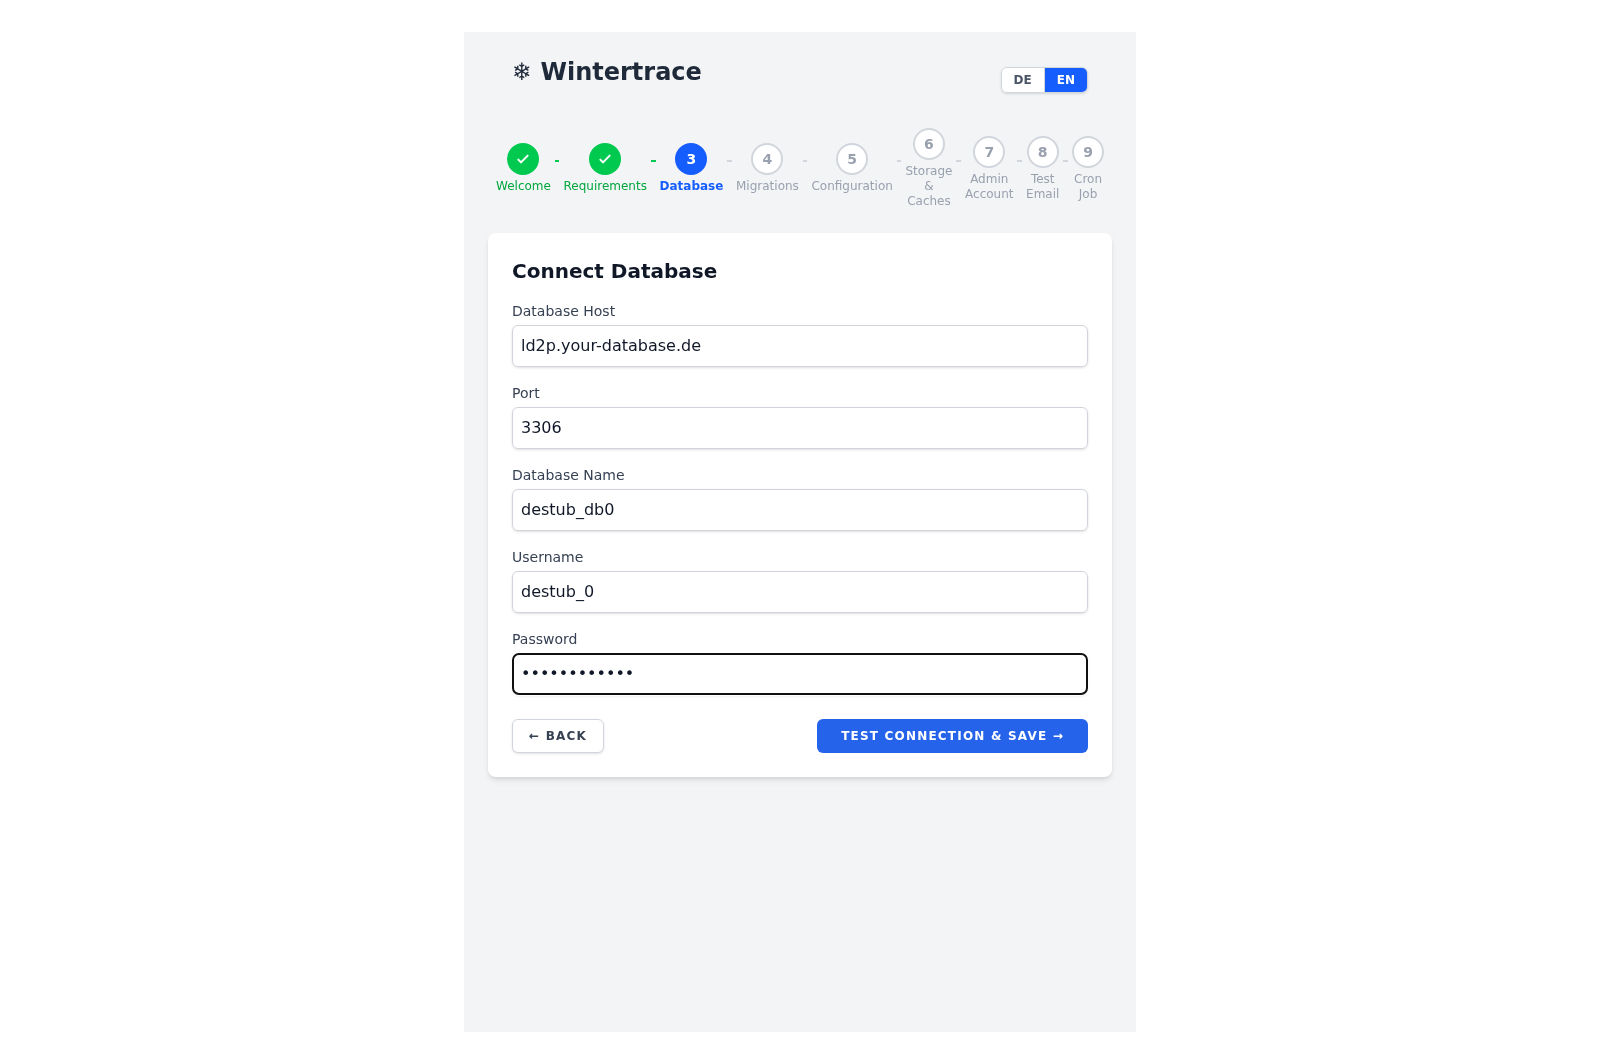
Database screen: host, name, user, password. The assistant tests the connection before proceeding. - 3
Admin account
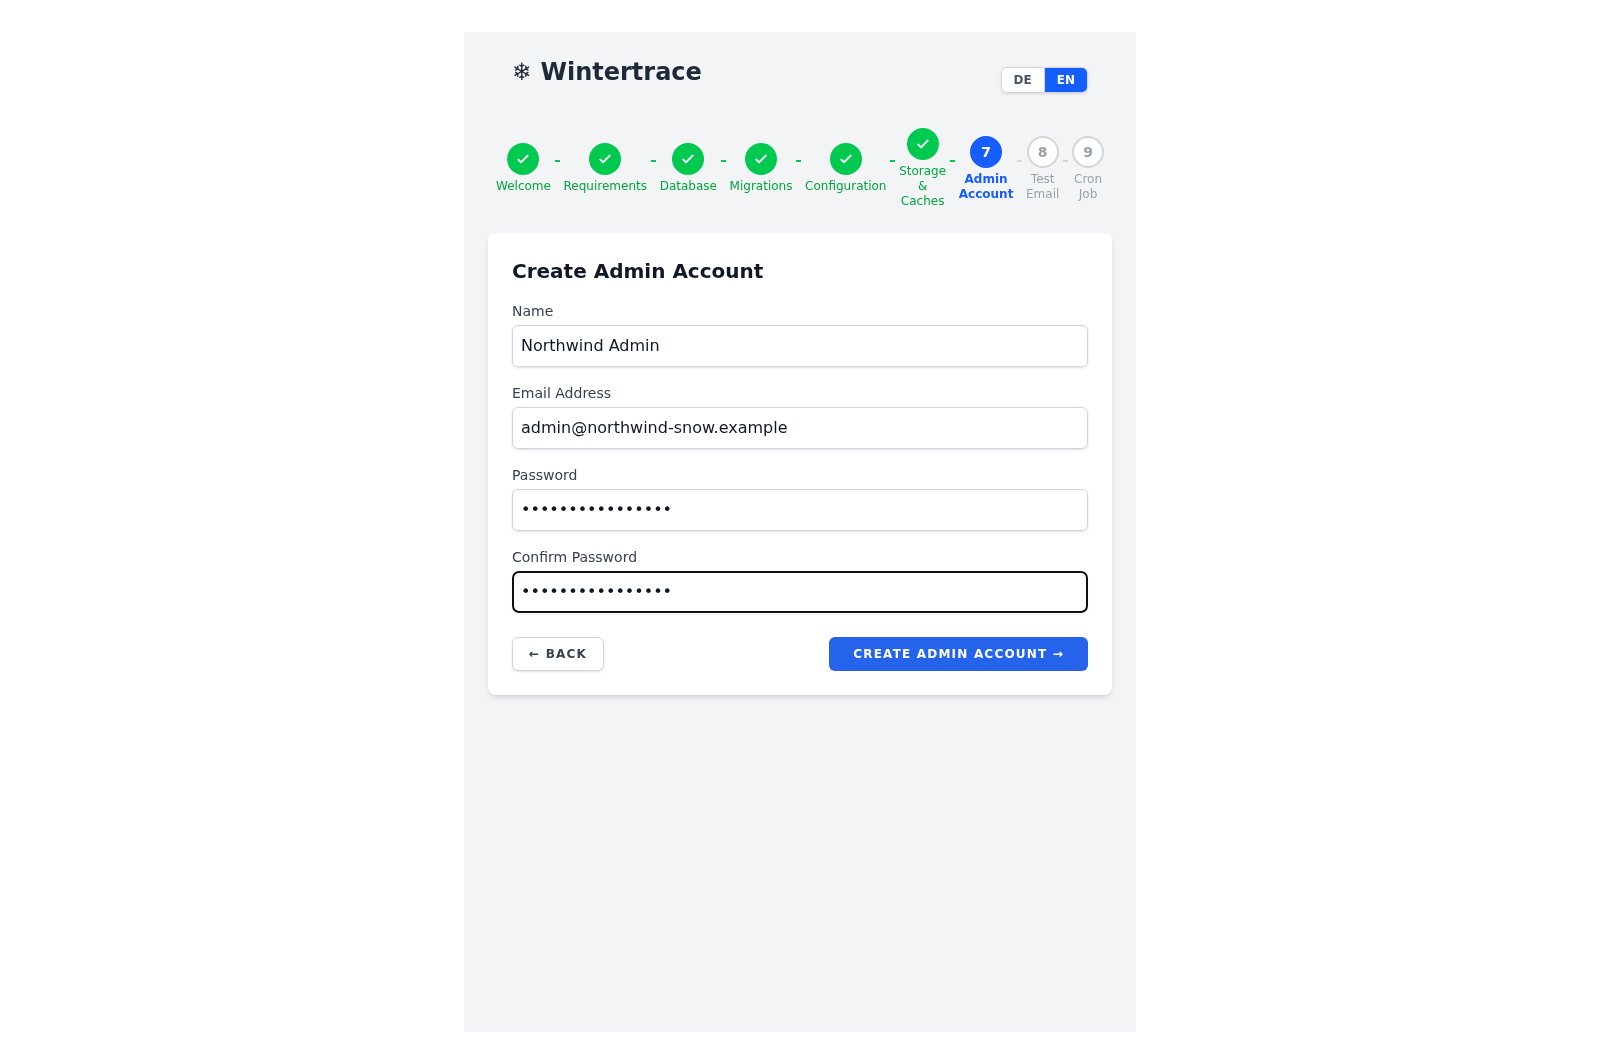
Admin account form with password strength hints. This is the only account created during installation. - 4
Done — log in and schedule the cron
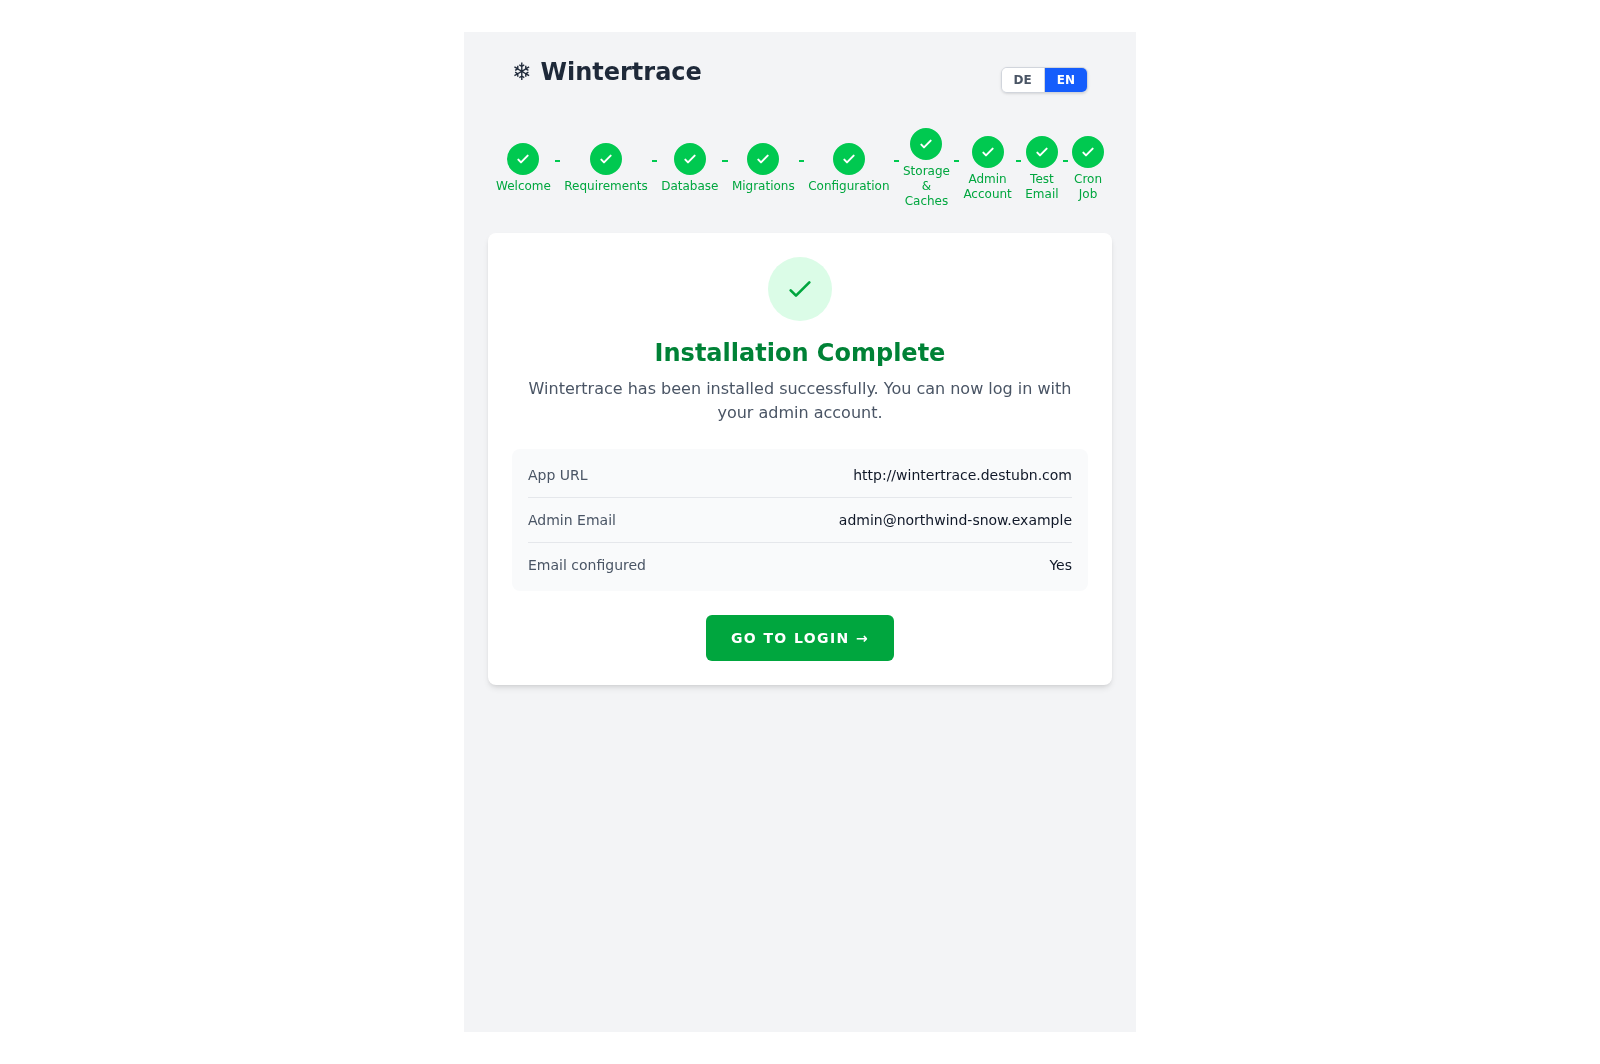
Final screen: confirmation, login button, and a reminder to set up the once-per-minute cron job.


Document root must point to public/
The document root — sometimes called "webroot" or "root directory" — is
the folder your domain serves. For Wintertrace, it must be the
public/ subfolder of the upload, not the
upload folder itself.
Example
If you uploaded the files to /wintertrace/, set the
document root of your domain to /wintertrace/public/.
Where to find the setting on common providers
- Strato Package management → Domain administration → Redirect/target → change path
- IONOS Hosting → Domains → Edit document root
- All-Inkl Domain settings → Folder assignment
- Hostinger Domains → Manage → Document root
- SiteGround Websites → Site Tools → Domain → Main Domain → Change document root
- cPanel (generic) Domains → Document Root
Other panels work similarly — look for "document root", "webroot", or "main folder" inside the domain settings.
If your host does not allow a subfolder as document root
Move the contents of public/ into the
top-level directory and adjust the paths inside
index.php accordingly. The browser-based
installer does not help with this step — when in doubt, contact your
hosting provider.
One cron job, every minute
One scheduled task drives weather fetching, PDF generation, notifications, and the cron heartbeat.
Wintertrace uses one cron entry that runs every minute. Each run processes any queued background work and exits — there is no daemon, so shared hosting that kills long-running processes is not a problem.
* * * * * cd /path/to/wintertrace && php artisan schedule:run >> /dev/null 2>&1Most shared hosting panels offer a graphical cron editor — the same entry can be added through that interface. The dashboard inside Wintertrace shows whether the cron is running.
Staying up to date
Updates are downloaded and installed from inside the admin area at a single click. Each release is verified against an Ed25519 root key embedded in the application — tampered packages are refused.
Updates never apply automatically. The admin decides whether and when to install. If an install fails partway, the application stays in maintenance mode and the next attempt resumes without data loss.
Adding optional modules later
The core install never needs an add-on. If a situation calls for one — for instance the Diagnostic module when a fault is hard to reproduce by email — two paths exist.
From inside the admin area
The Modules menu lists the current catalogue. One click installs an add-on, signed against the same Ed25519 root key as core updates.
Manually via FTP
Download the module from the catalogue at
/modules/,
unpack it, and upload the folder to
modules/ inside the installation.
Try Wintertrace.
Download the signed ZIP, upload it, point the document root at public/, and run the browser-based installer. Plan about ten minutes from start to running install.
install.php · Ed25519-signed core · GNU AGPLv3
Read the installation guide →